Below is a collection of photos from when we built our house. It was disastrous at times, but well worth the three years of stress and anxiety. These photos will be out of order, but chronicle going from empty lot to moving in. There are people in these images I would not hesitate to punch in the throat if I ever see them again, but they were there at the time, so no sense pretending they weren’t. Such is life.
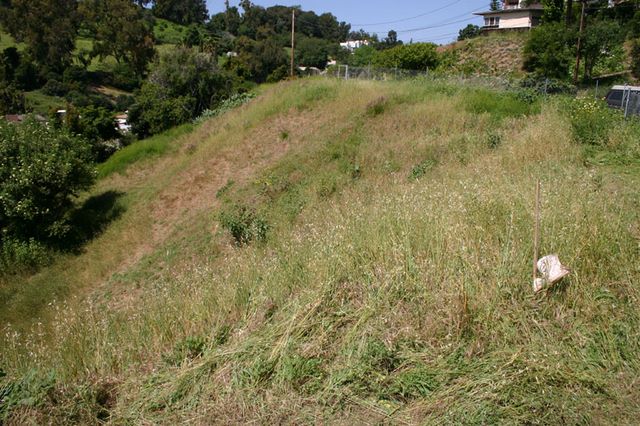
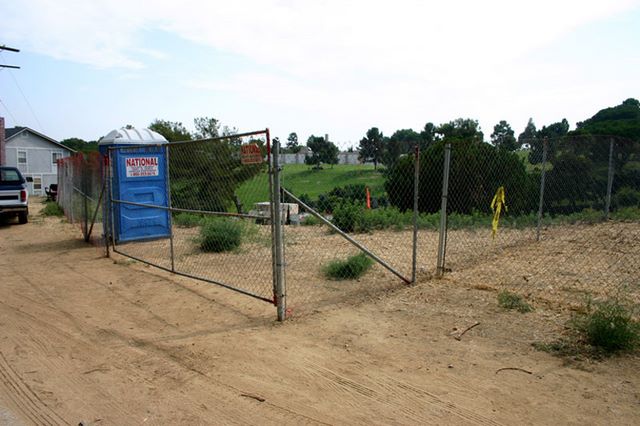
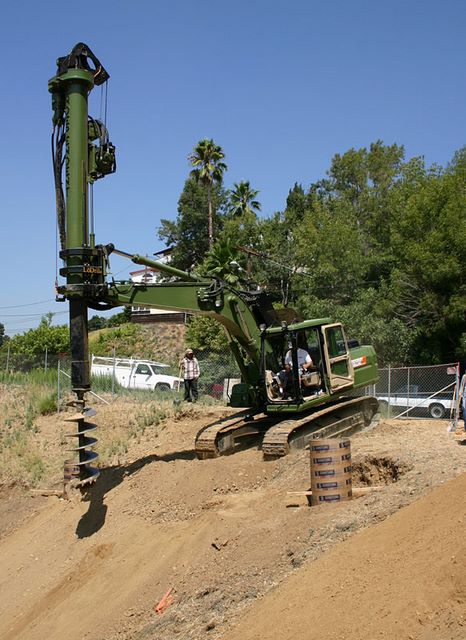
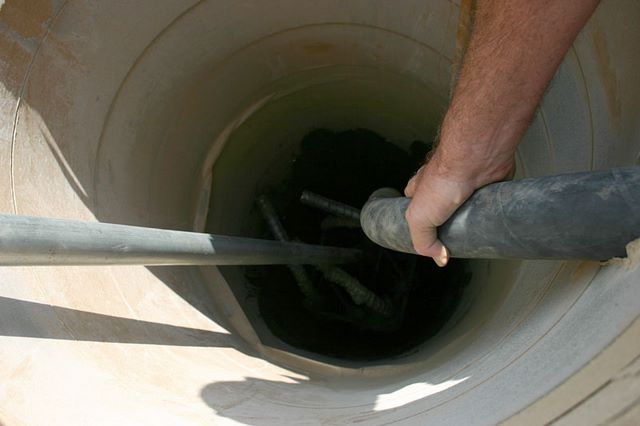
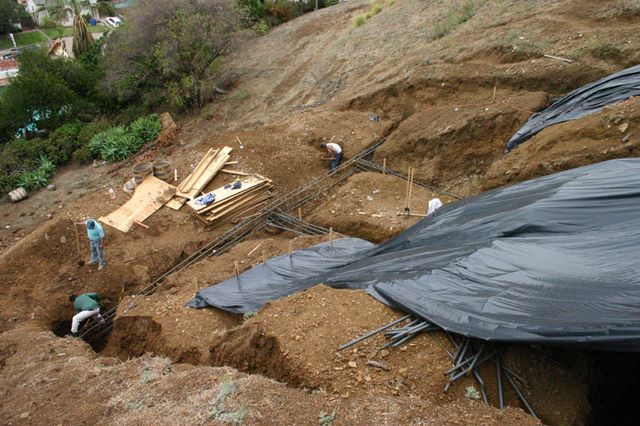
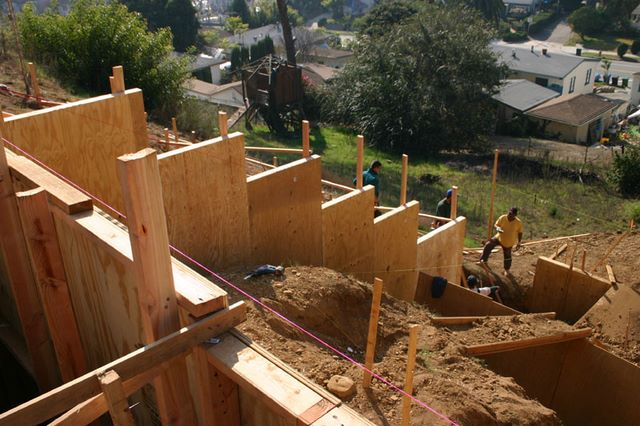
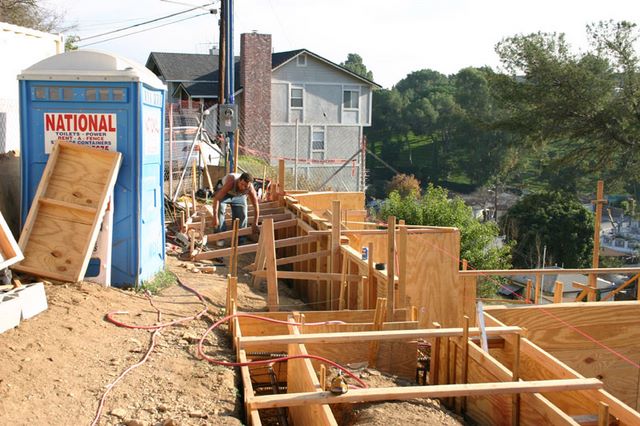
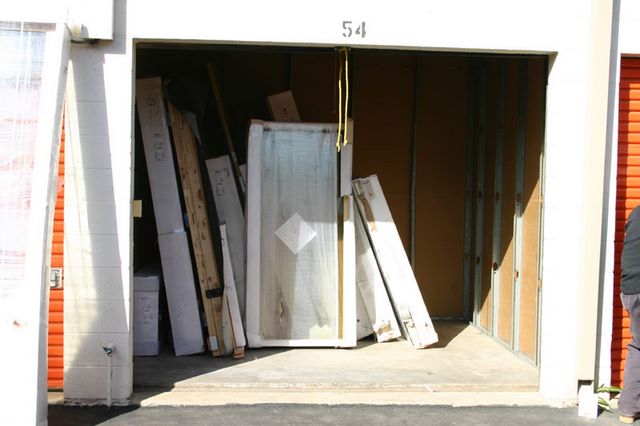
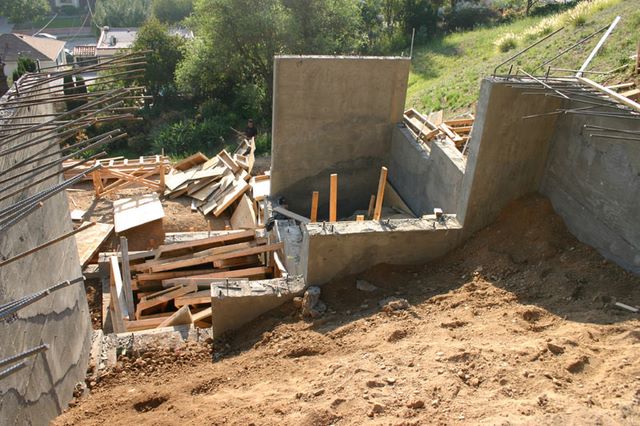
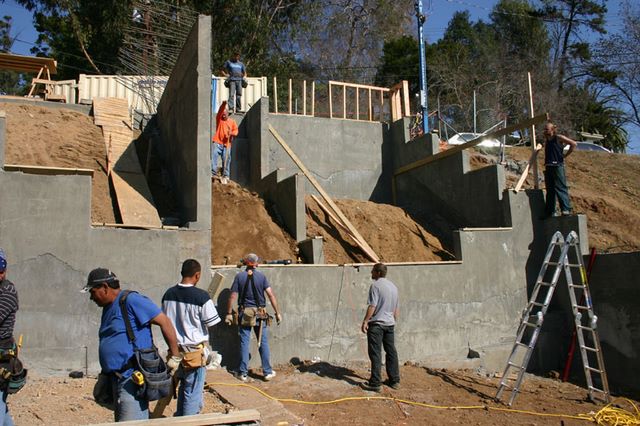
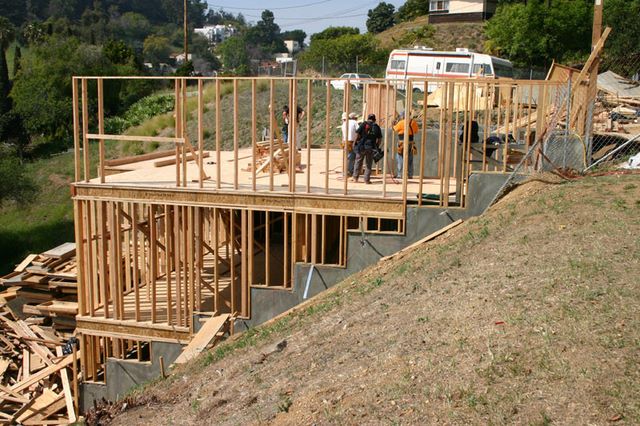
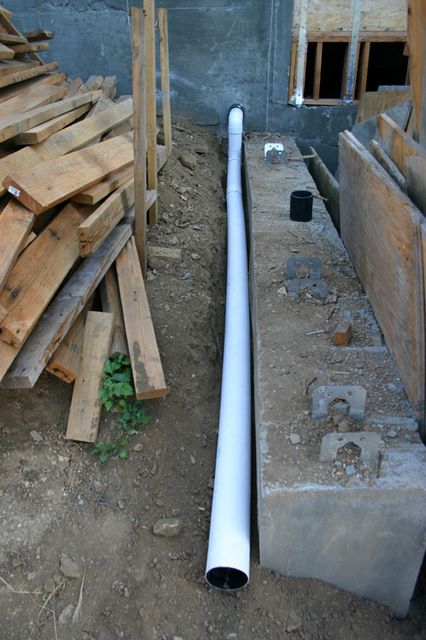
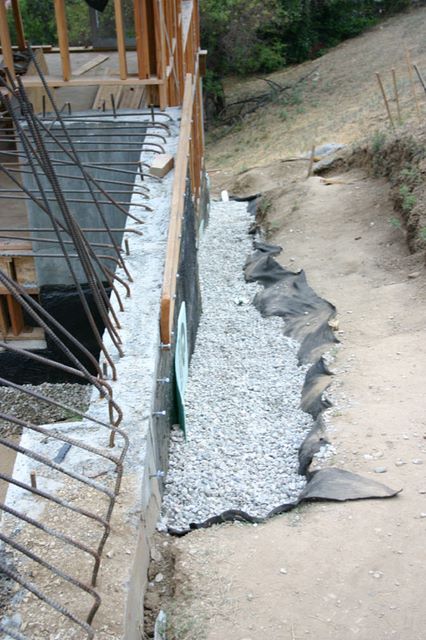
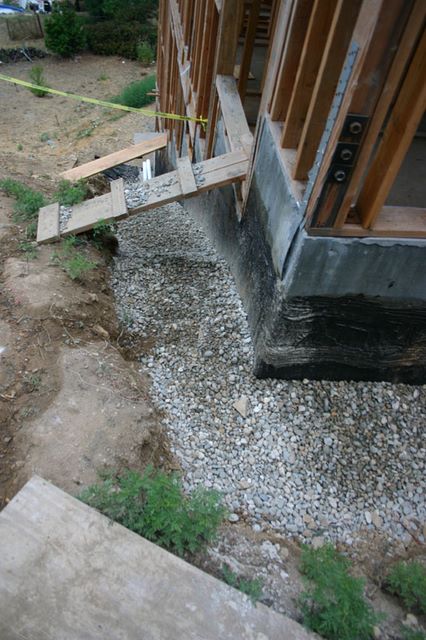
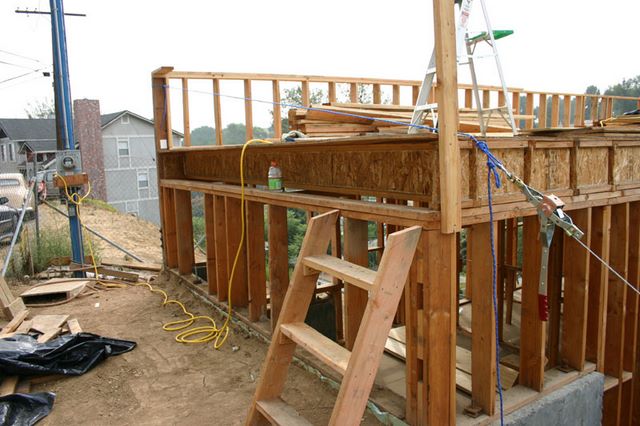
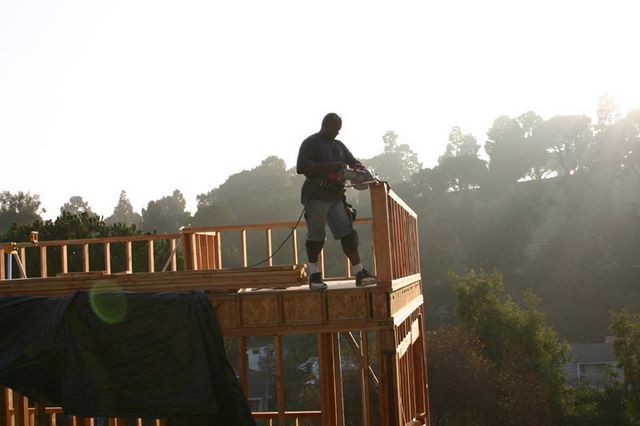
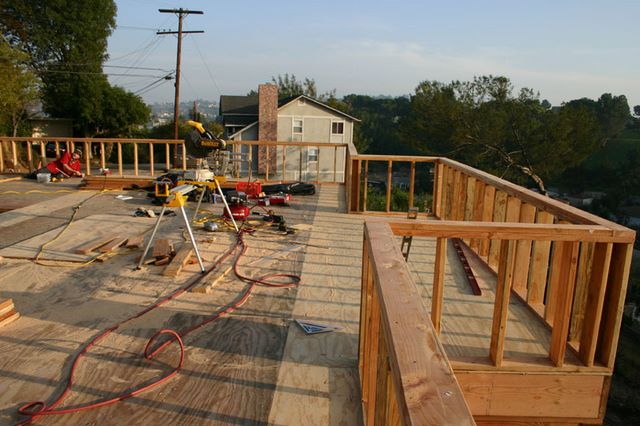
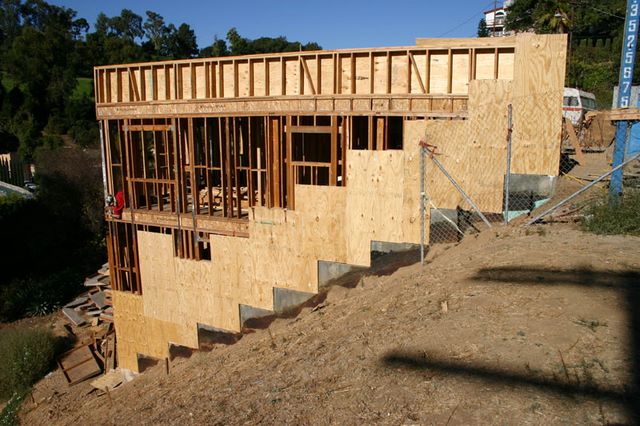
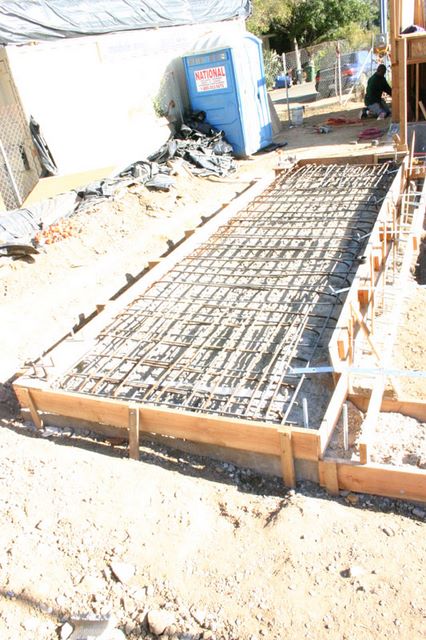
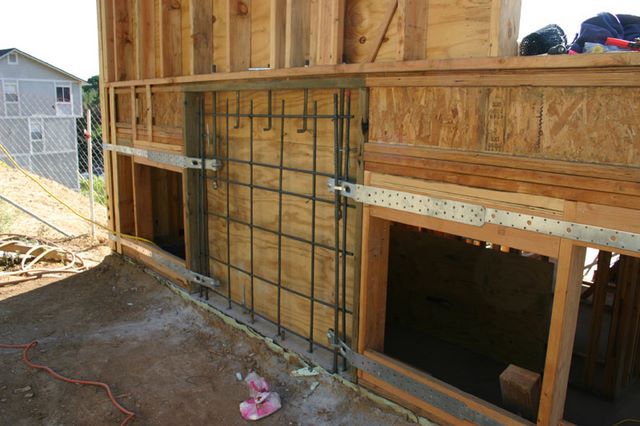
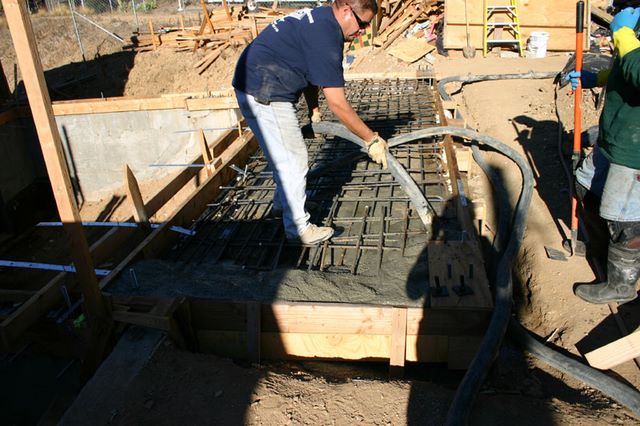
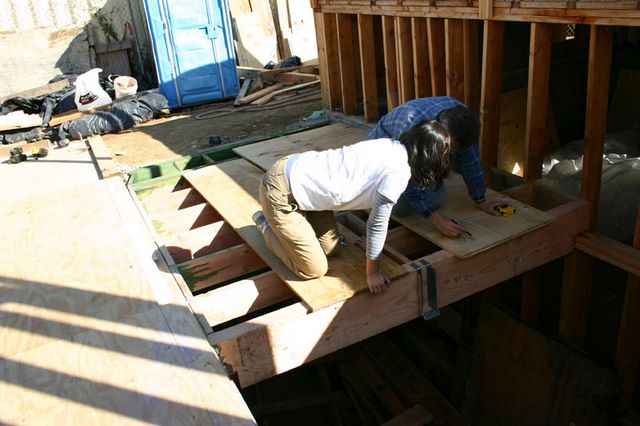
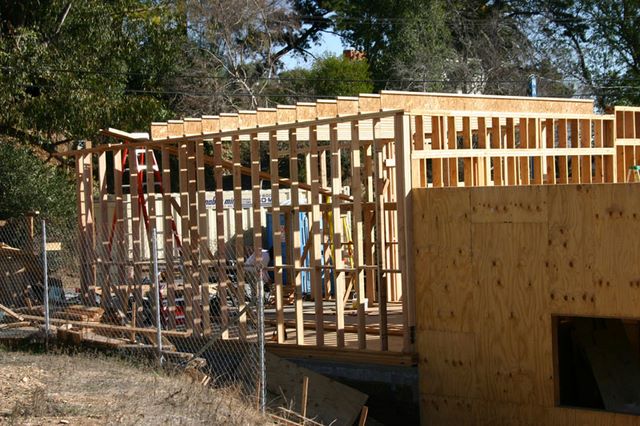
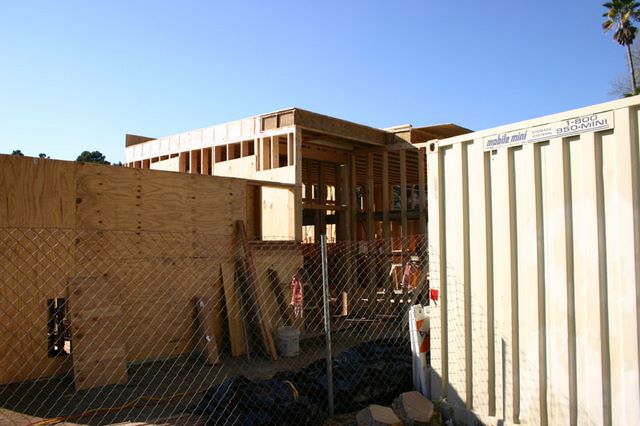
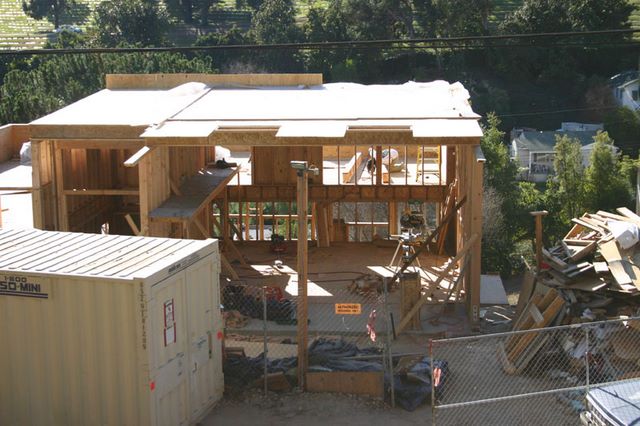
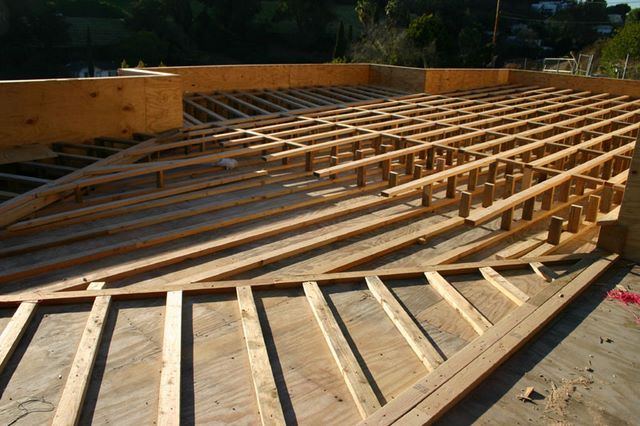
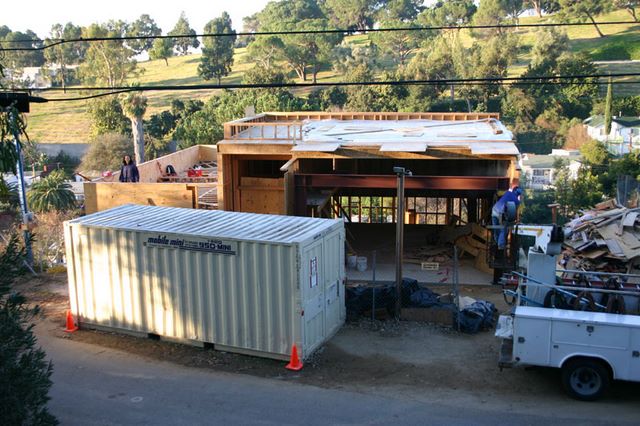
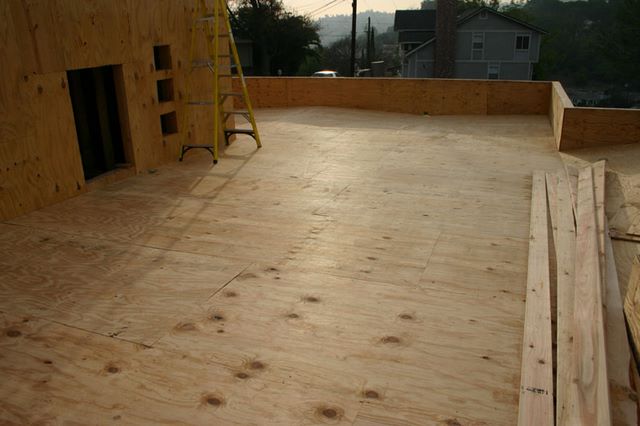
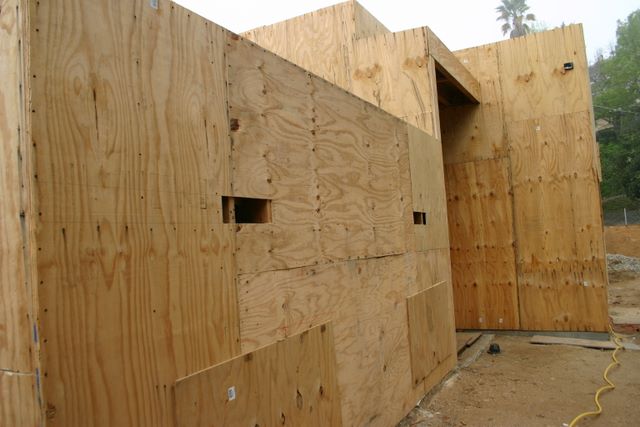
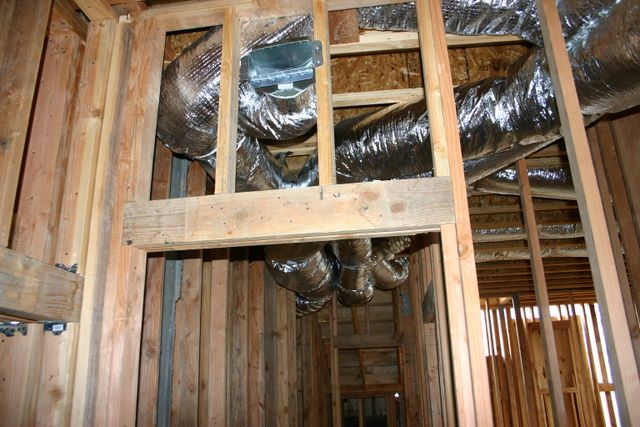
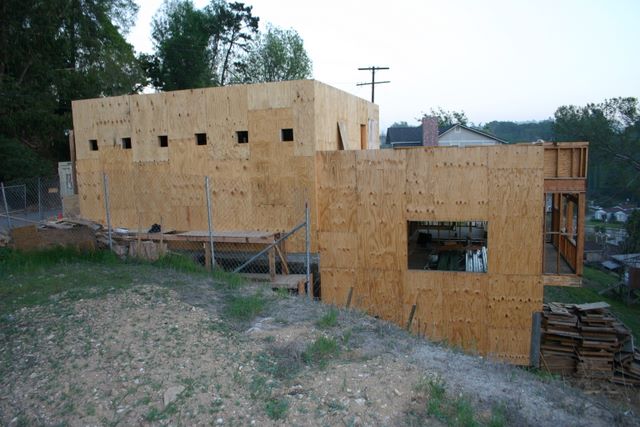
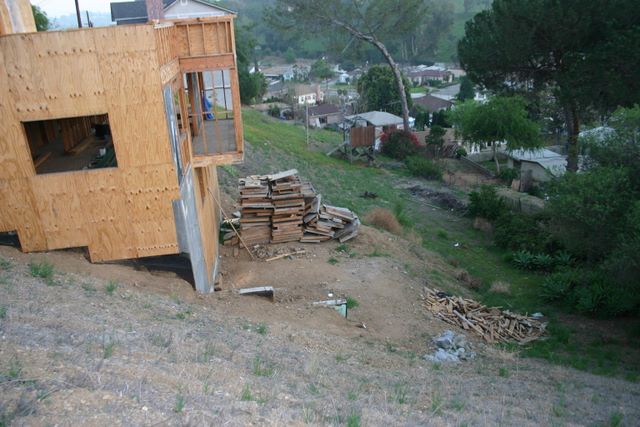
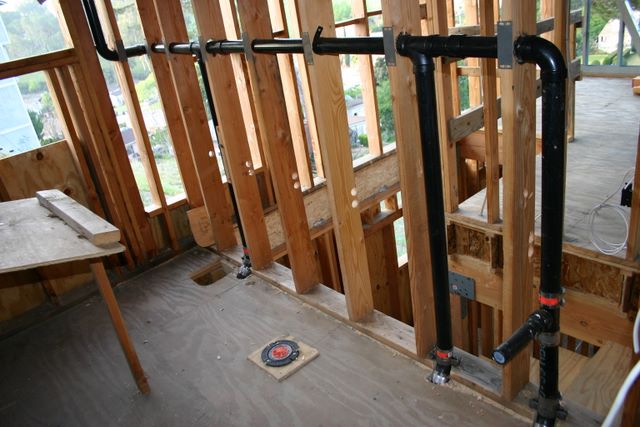
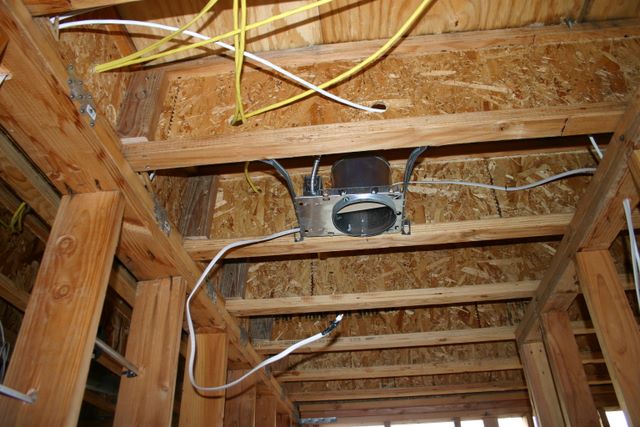
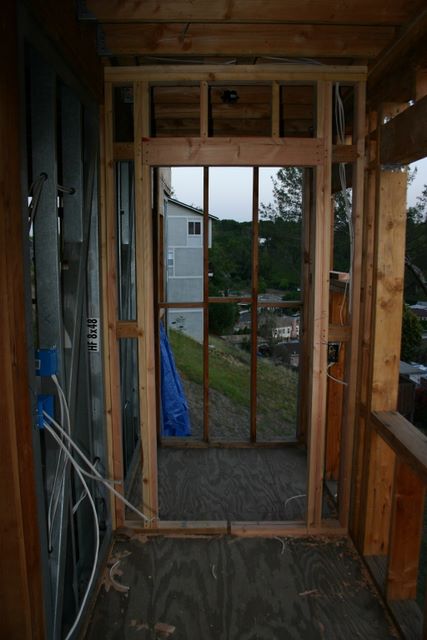
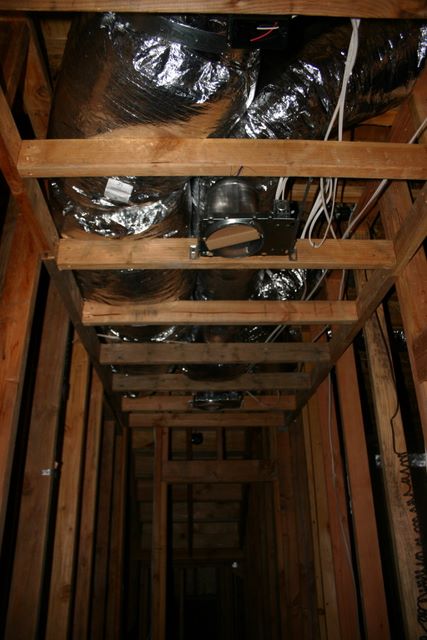
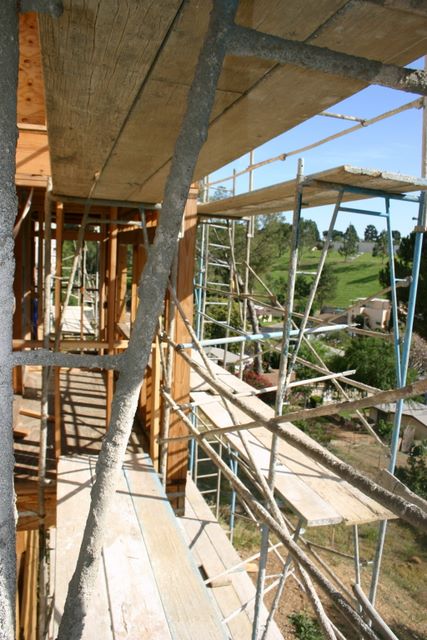
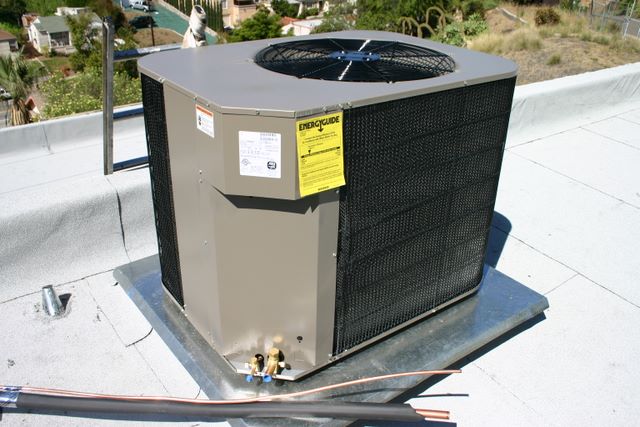
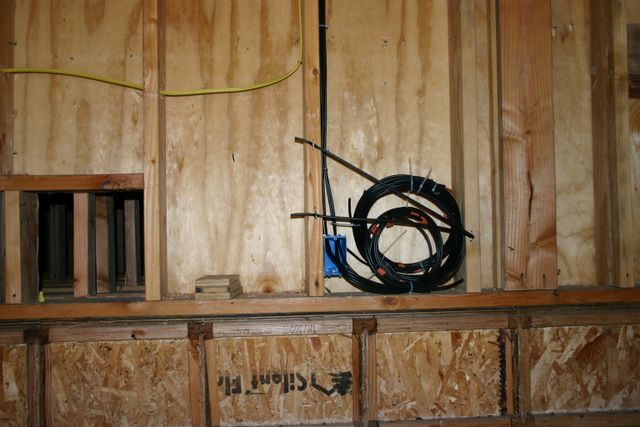
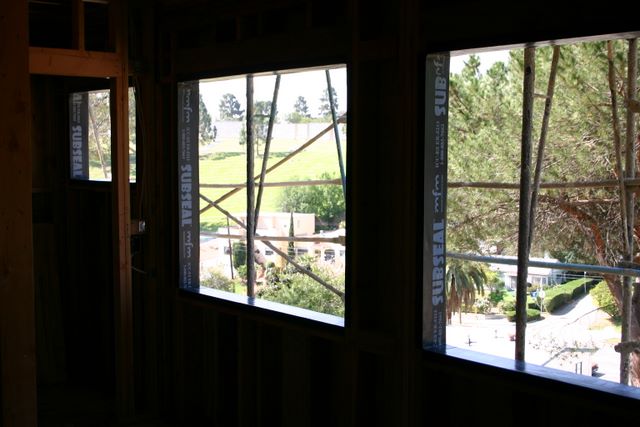
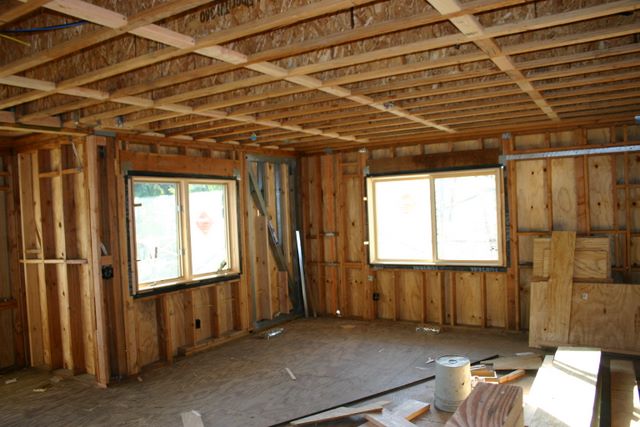
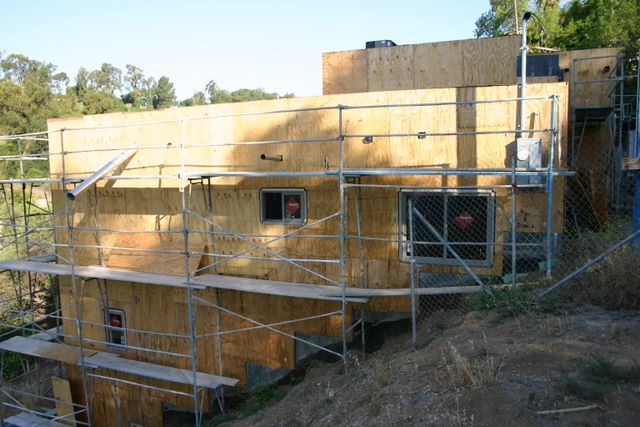
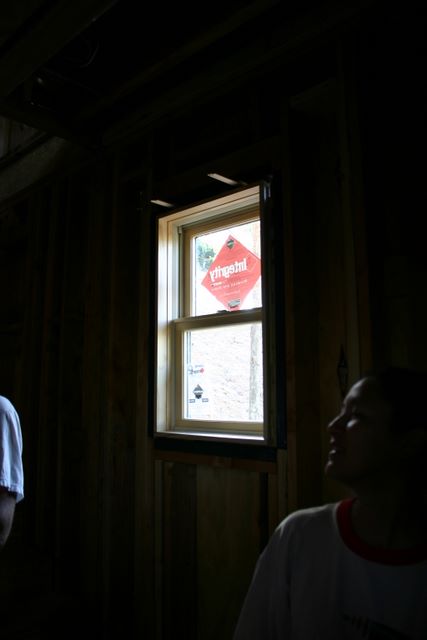
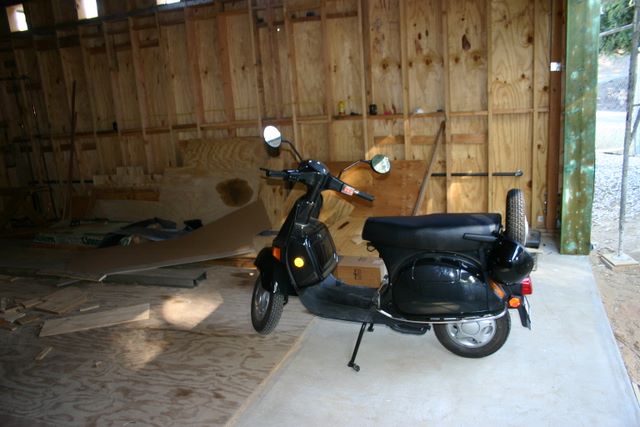
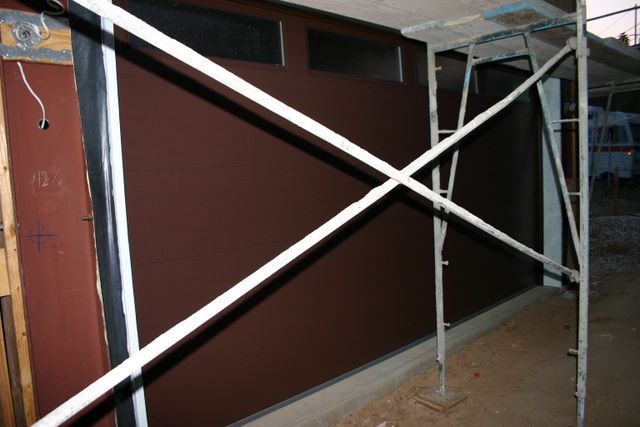
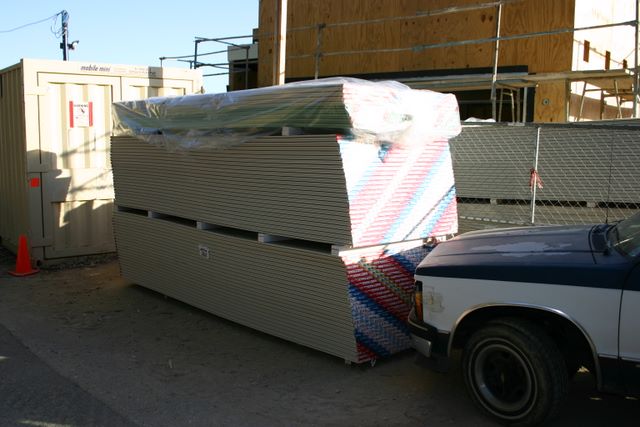
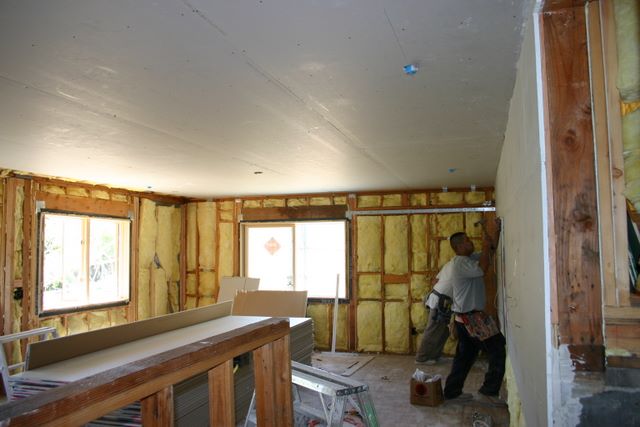
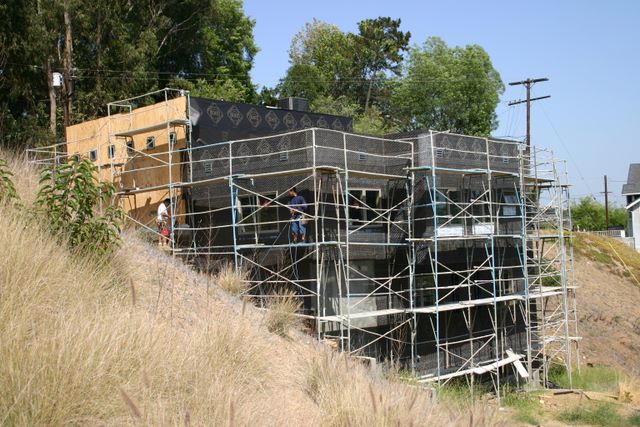
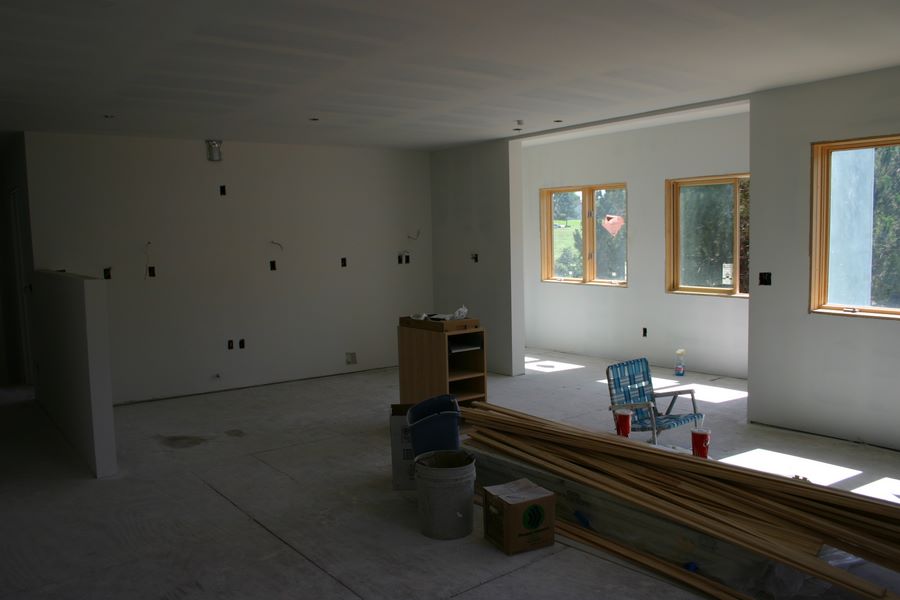
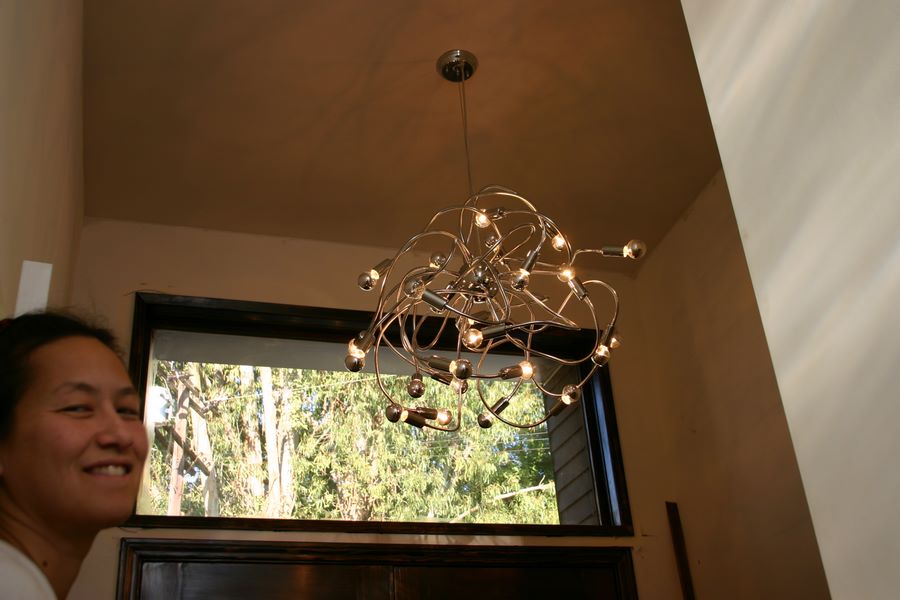
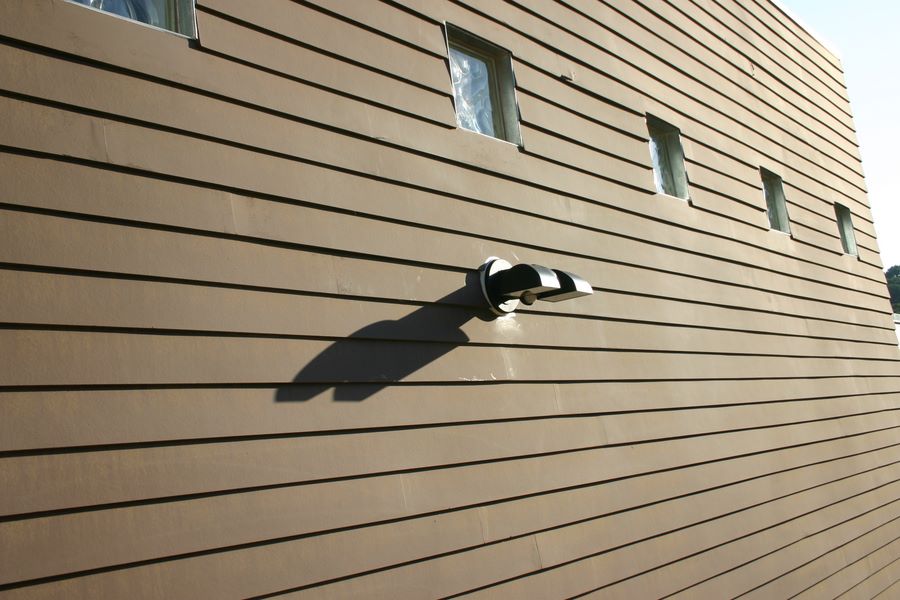
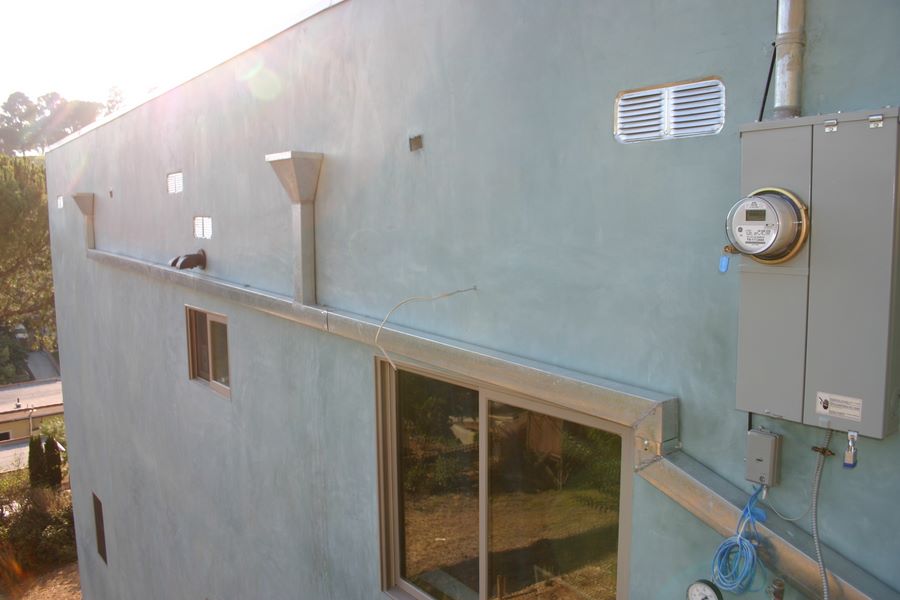
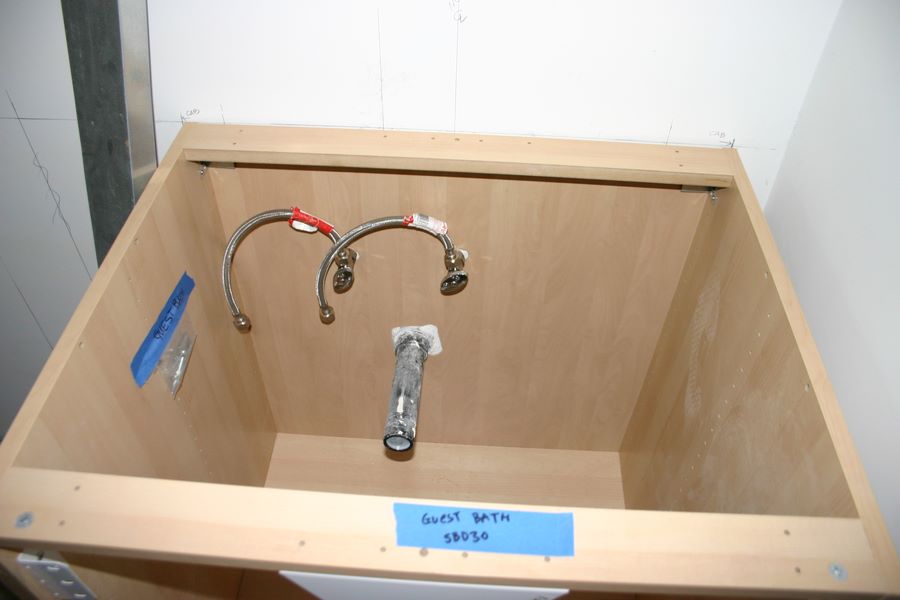
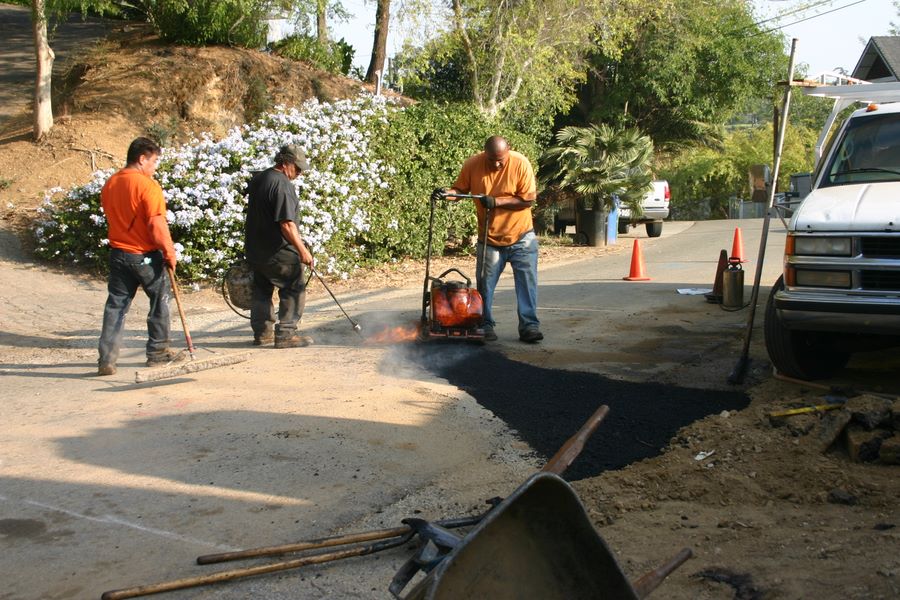
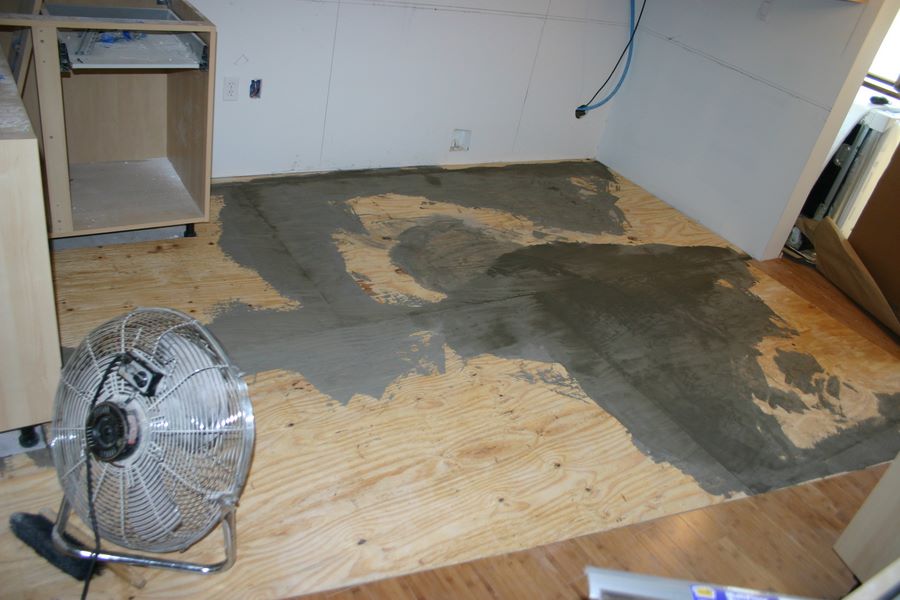
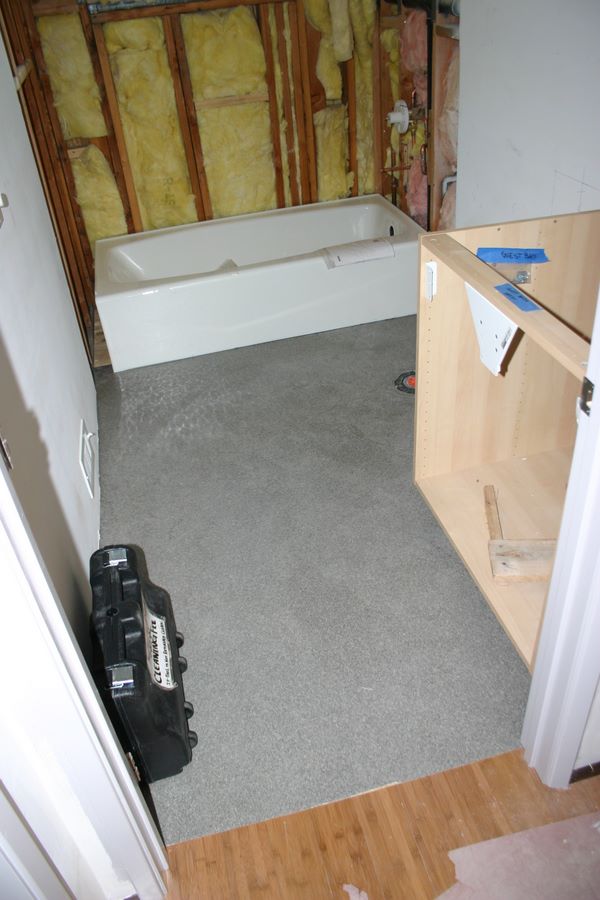
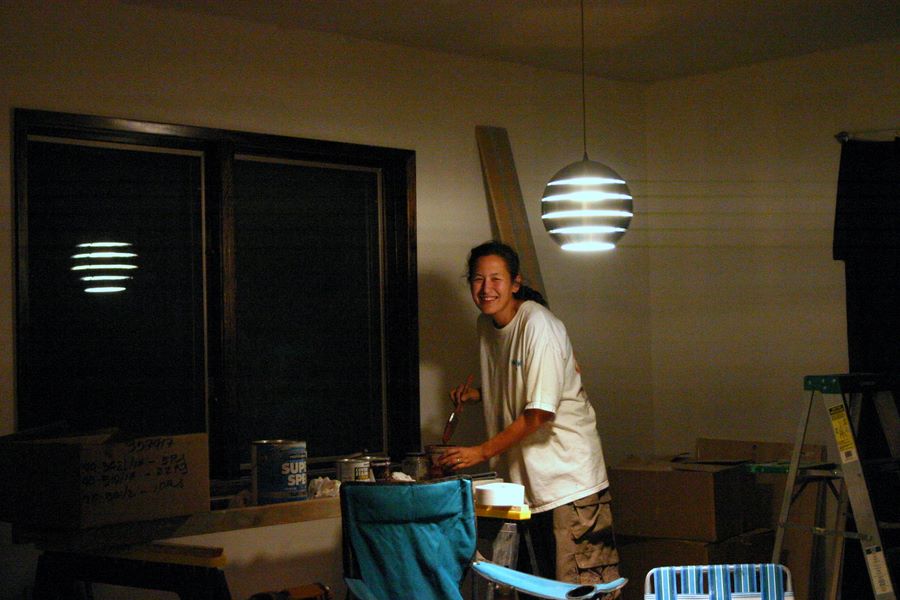
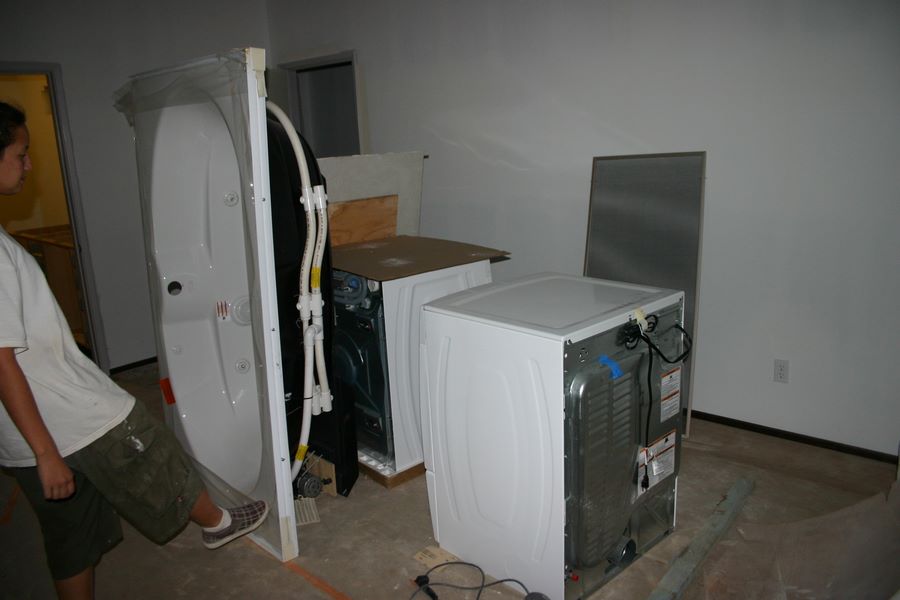
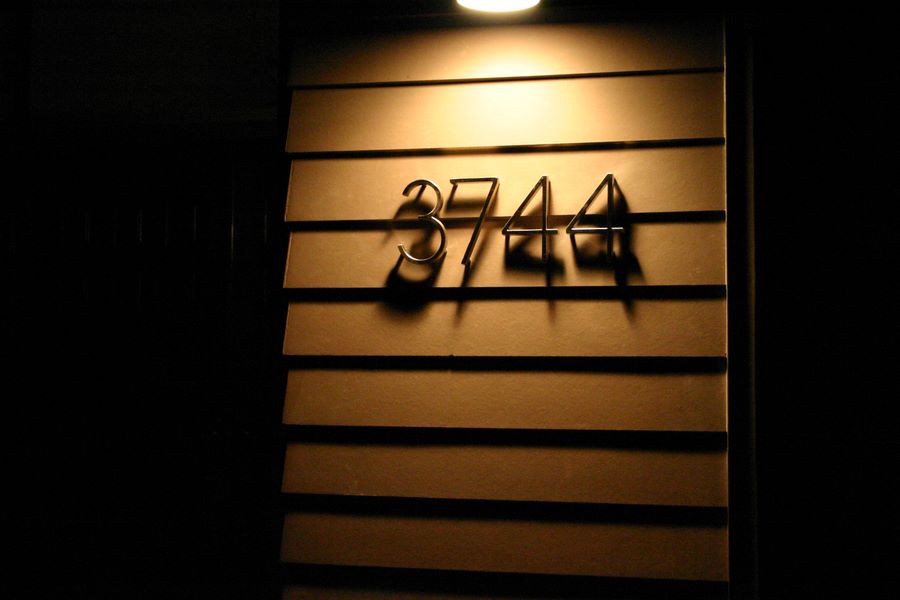
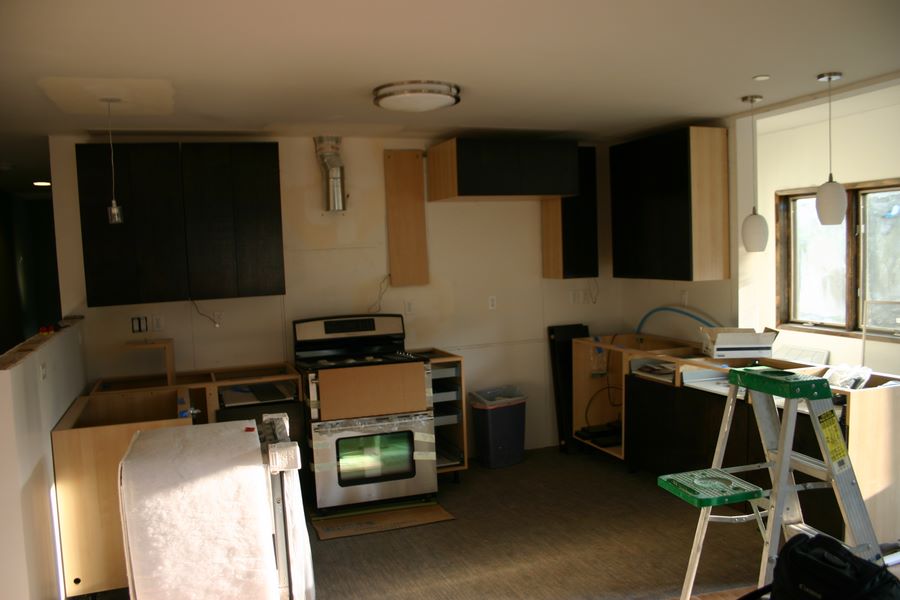
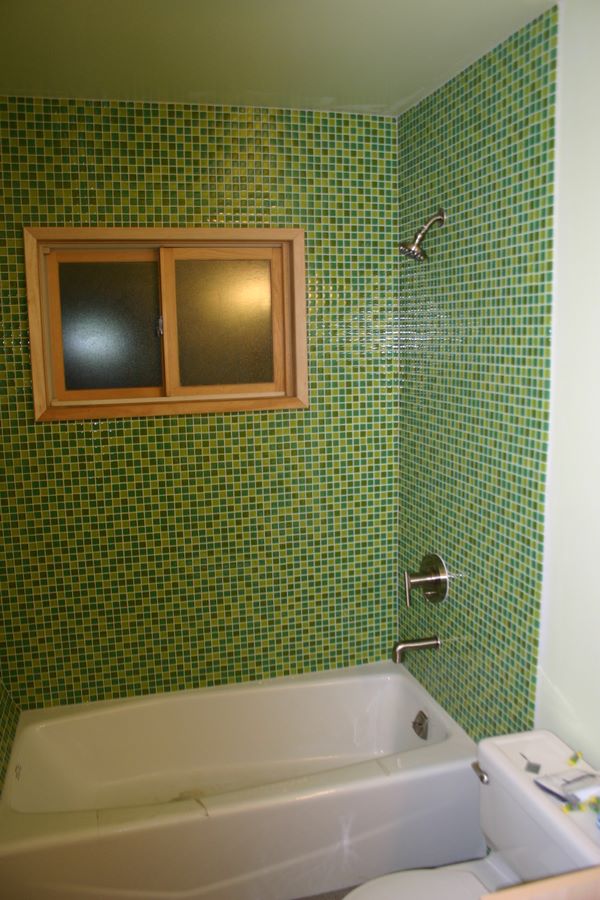
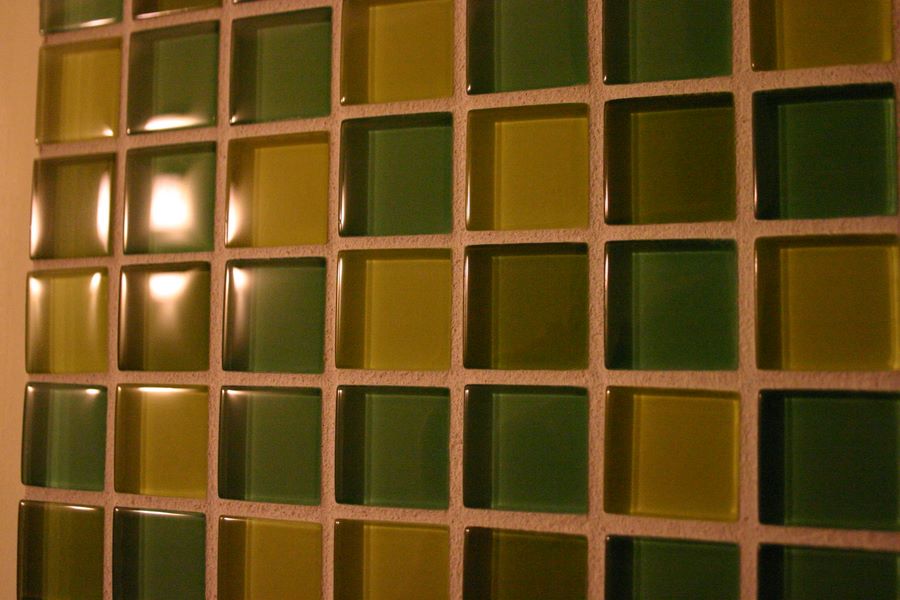
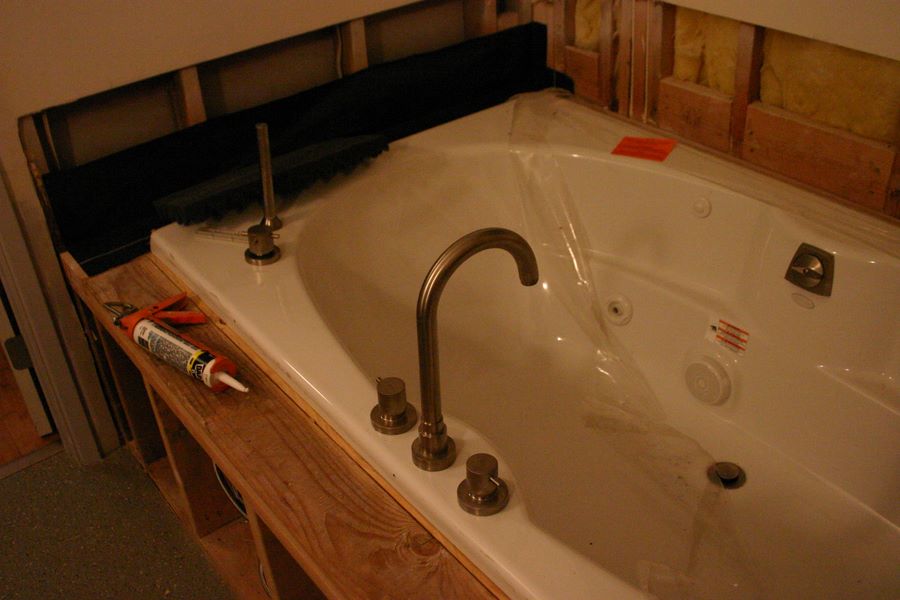
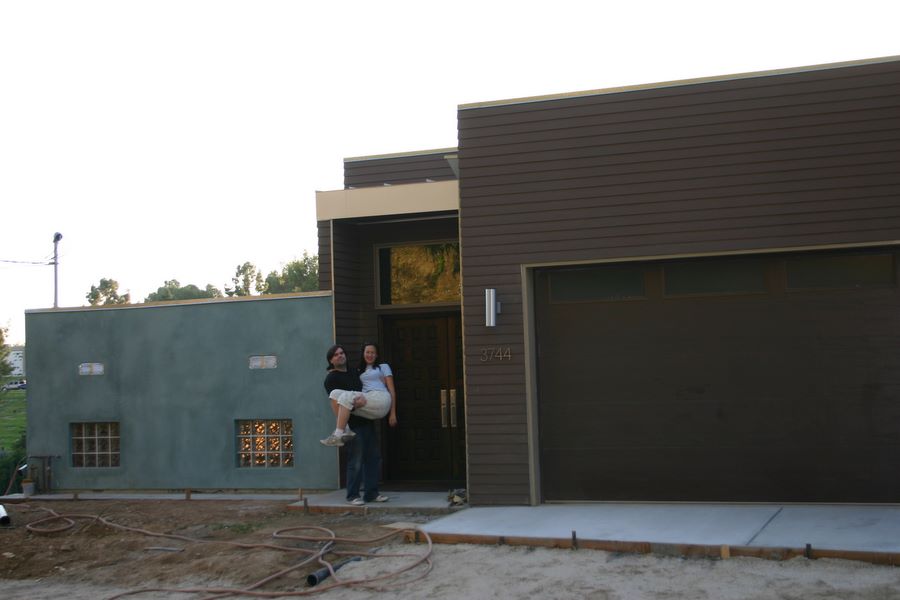
March 30th 2005 – Sylvia discovers the lot for sale and snaps a few shots of the area.August 15th 2005 – National rentals shows up to install construction fence and port-a-pottyAugust 30th, 2005 – Temporary water supplied by DWP (for a nominal $500 fee)August 30th, 2005 – Driller arrives to dig caissonsDrilling rig from behindDrilling caissons on fluffComing up from belowSeptember 1st, 2005 – Temporary power!Giant toy towing rig arrives to save the day- the drilling rig couldn’t make it up steep hillsideCaisson holes filled with sonotubes from afarTying cages (to go into caissons)Crane up closeSeptember 15th, 2005 – Cages being lowered into holesSeptember 16th, 2005 – Pouring caissons with cementPouring caisson holes. The center caisson ended up being 46′ deep.September 21st, 2005 – Mascot Found. Uncovered while digging.Trenching. Even in this shot, you can see the line between caissons in not a straight run.September 23rd, 2005 – Crew begins digging away hillside. This should have been done with heavy machinery, but our site supervisor claimed his crew would be faster. Three months later, we were still digging…Trenching continues from September to December. We covered the site in plastic to avoid the trenches being filled with sluff.More grade beam trenching. We have months of these similar photos.Grade beam trenching. The man in the straw hat could have been killed at any moment due to a collapsing trench.Grade beams being tied into trenches. The dirt here is fill and highly subjective to sliding. At any point we could have killed a crew member due to un-reinforced trenching. The site supervision shrugged when Sylvia’s dad told him he was worried about the situation.Foundation forms- costly lumber used inappropriately (high-quality lumber was used and destroyed when in contact with cement). These cement saturated forms are now in a stack 12 feet tall at the bottom of our hill.The massive fort of dirt and lumber. At this point, the structure is not plumb or level. More on that later.December 21st, 2005 – Foundation forms. Many of these walls ended up blowing-out during the cement pour due to structural inferiority. Blow-outs means lots more cement was required ($$$)December 23rd, 2005 – Front wall foundation form/rebar.December 27th, 2005 – Grade beam beneath garage. We ended up paying for MUCH more rebar than was required because our site supervisor made a mistake when instructing his crew. When told about the mistake, he quit claiming he was leaving the construction industry. No such luck.Grade beam forms being re-inforced.Building forms and setting rebar. This type of form building isn’t really done anymore- you can rent metal forms for this type of thing. Instead, the site supervisor insisted this is how to form a foundation- a costly example of how out of touch with reality he was.Our windows and doors arrive and promptly go into storage- a storage unit we will pay for for months…The cement is poured into the foundation forms. You can see a blow-out in the middle of the wall. You’ll also notice the lack of any trawling to smooth the top of the forms. No smoothing and no leveling. This means when the framing plates are bolted down, they are uneven and the rest of the framing will carry this lack of level.After the pourShot down the garage. The rebar sticking out of the side walls will all need to be cut out because of bad placement. They end up too close to the edge of the walls, making their intended purpose- a suspended cement garage floor- impossible.The foundation is revealed to have many cold joints (the large garage/entry wall has two very distinct such joints). To avoid cold joints, the cement should be poured in one shot. Instead, our site supervisor insisted on pouring cement in sections. Just another of the many examples of his ignorance.Framing begins when the baseplates are bolted to the foundation. As is evident from even this photo, these plates are not level. However, this can be corrected from here by carefully measuring the studs as the walls are built up. They are not. We end up spending months re-doing much of this framing,Forms being peeled away from foundation wall.The framing goes very fast. Unfortunately, this is due to the lack of leveling along the way. Even this photo shows non-treated lumber added in direct contact with cement. This is a good way to have your framing rot out from under you.Beams being added to set floor joists atop of. With the use of TGIs, this floor should be quiet and strong.The lumber drops start rolling in.Framing of the mechanical room is well underway. After the re-design, this area has become the master bedroom.1st floor walls starting to go up.Crew begins framing interior walls. Unfortunately, these walls all needed to be torn out due to the redesign of the house. On the plus side, these walls were out of plumb anyway…From this far, it’s hard to tell how bad the framing is. It actually looks pretty good. Only upon closer inspection do we realize how out of plumb and level everything is. The foreground wall (among other things) ends up being re-done completely.Side shot of the framing progress. Notice the massive pile of forms and other debris at the bottom of the hill.Second contracting crew was brought in to make corrections to the MANY issues the site supervisor’s crew made in the scant month of framing time. This second crew works on corrections for another month- at one point rebuilding the entire back wall. In this shot, they are having to reframe the north-east wall (under the living room). It was a load-bearing wall that was improperly built.April 4th 2006- Not long after we fire our site supervisor for gross incompetence, our storage box is broken into. Thieves torch through the lock under cover of rain and darkness. They steal our expensive tools and also make off with our new construction crew’s tools. Since the thieves had clear knowledge of how to approach the site and what they would find (i.e. enough to make the risk worth it), it is clear to me that some member(s?) of our former crew were responsible.Torched padlock. Thieves knew we only used one lock (secondary lock is more difficult to get to and tempered steel makes torching near impossible)- a mistake we will regret. They also switched the breaker on the temporary power pole to disable our motion sensor light. As previously stated, they knew their way around our site.Under the master bedroom, site drainage tubes run out the side of the houseRunoff tube with filter shealthSite drainage runoff tubeSite drainage crew gets down to waterproofing the foundationFoundation waterproofing under the garageMore waterproofing. Two feet of compressed soil will soon cover this gravelSheeting has begun downstairsOctober 27th, 2006 – Our first week of self-improvements. Sheeting the downstairs has begun. Under the sheeting we had to cut MANY furring strips to get the sheeting levelThe notorious front wall just prior to total removal and recreation (see next photo)Every opening in the house had to be rebuild to get properly sized and leveled.Normandie using the skill saw while finishing the roof parapet.Working on the parapetWe sheet as far as we can reach. From here, we’ll need scaffolding to complete the job. (note: red spot on left side is Marcus leaning out to nail down straps)Shot from the side show completed parapet and massive scrap piles at the bottom of the hillMarcus getting into the actGarage outer slab finally has proper rebar treatment in preparation for cement pouringThe front wall that we had to remove completely and re-build. The two openings will be glass brick. Later we poured concrete into the area with the rebar for a stem-wallIn comes the cementSylvia jumping for joy that cement pad is finally poured.Our garage floor joists are added and tension support system installed.Close-up of garage floor joists and tension supports.Normandie at night (we were working late to finish the rear garage wall because the living room ceiling was jacked up with three hydraulic jacks, one of which kept leaking)Sylvia and her dad doing some on-the-fly stair tread calculations.Our first stair! Stair leads from entryway to living room floor.Entryway door and transom standing without aid of surrounding wallsGarage gets walls. For size reference, the orange ladder is twelve feet tallGarage walls as seen from rooftopGarage ceiling joists being added. The garage walls are framed with half-inch over a foot slope to aid in water run-off. Finally something not level that was done on purpose!Shot from side showing the garage framing in relation to the rest of the house.Garage and entryway roof almost complete.Shot of the entryway awningShot of garage and entryway from across the streetShot into the entryway. The left half will be a closet, on the right is the stair down to the living room floor. The openings in the upper right will be glass block.Plates are put down to start building rooftop slope framingSylvia measuring the cutsWork begins on roof slope framing. We will end up building 80 walls that have to be properly sloped for water runoff.Shot from garage vent opening under roof slopeSlope walls making progressMore roof slopesAfter four days, the majority of the roof slope framing is completeJMI Steel arrives to install the garage moment frame. In this shot, the top I-beam is being transported into place. This frame is to resist horizontal forces.Moment frame gets some spot weldingWelder arrives to do the proper welding the following day. The following week, the welds are inspected via ultrasoundRemaining section is done two days laterRoof is sheeted and ready to skate!More shots of the sheetingInside the garage, with the roof venting openings visible.Parapet over garage is completedSylvia and her friend, noodle monster (HVAC outlet vent)Space Noodles! This new mechanical room will soon house our furnace (we need to create a cement pad for it, first)Bottom stair tread is complete (03-03-07)First step to landing complete (03-03-07)Trash pile gets removed to roll-off dumpster (we did this one ourselves before finding a hauling company that wasn’t an arm and a leg)Sheeting complete for front of house- two glass-block windows are covered with ply. The two holes are for roof-slope ventilation.The cement pad for the furnace (as small as this is, it was around 20 bags of cement)HVAC tubes (space noodles) run from furnace room into utility closet (i.e. laundry room)Underside of garage floorTo break up the wall, we evenly placed holes for 12 glass blocks in the garage. The garage will eventually be wood siding with the house portion stucco. Still looking for the correct color combo…The pile of forms and bone yard number one before the haulers…Roofing material is delivered.Torch-down rolls are stacked. The other rolls are underlining. We’ll have to work around these rolls. Each weigh ~65 pounds and will be moved around many, many times.Marcus and Normandi working on the underlining layerThe tools of the trade (the bag in the center is Zankou chicken- lunch is served!)Roof above the garageSame section now coveredSame scene after haulers. Like exorcising a ghost.While we work on finishing the roof, the plumbers have been busy downstairs. Here the guest bath gets rough ventingAlso busy are the electricians. This can is in the upstairs hallwayScoot comes in and completes his first job- a soffit in the closet downstairsShot of the wall separating the master bath from the washer/dryer roomPantry gets a doorwaySylvia with the firring wall she and Scoot builtThe master bath looks really big once the haulers take away the saw horse pileVentilation and electrical share space above the master closetThe furnace arrivesSylvia’s truck does the delivery of the master unit. This is the first time a vehicle parks on the garage floor- albeit only one tireLouie and his brother install the furnaceScaffolding arrives!Side shot. We are days away from finishing the sheeting once and for allWith the scaffolding up, we’ll be able to complete sheeting. It will remain up until we are finished with the stucco (many weeks from now)Shot from above- two exciting additions are pictured- the roof is complete and scaffolding erectedFinished roof. We finished the roof on Saturday (04/15) and were awoken around 3:30AM to the sound of a torrential downpour. Despite great fears, the roof held up fineAnother shot of the roof. The dark patches are mastic applied to help protect seamsThe roof above the garage. The pad in the background will hold the AC unit, the vent in the foreground is for the hot water heater…then looks a lot smaller after the whirlpool tub gets a frameSewer pipes getting ready to be connectedShot of the furnace from above.Sheeting the side almost completeMarcus’ mom in town, helping with the clean-upPutting the parents to work. Marcus with nail gun above, his dad below pounding in shinersA/C unit is installed on the roof via crane truck. It’s around 400 pounds.The A/C unit in placeCoax has been run to a central hub in the garage.Breaker box where all electrical runs end up. The blue tubes are network cable runs. Someday a switcher will connect them all…Walls now complete with electrical, plumbing, venting, gas and blocking. Now they just need insulation and drywall…Blocking under the stairs- new opening (doorway was too narrow) leads to another new opening under the stair landing. Around the corner is yet another (smaller) opening.Drywall blocking under the stairsDrywall and edge blocking has gone in down stairs.And some drywall blocking upstairsElectrical box is installed on the side of the houseEvery water run in (and outside as seen here) is copper. Other plumbers were only running copper to drinking water locations.Regular trash pickups have been scheduled. Note the alarm will sound warning. This is not a joke.View from road below. Sheeting is completeDue to building and safety rules, we have to expand the area around our electrical panel. You need 3 feet accessBlock party!Sheeting is done! (note tubing we attached to the drain to prevent rain water from pouring down the sheeting)Window openings get a vapor barrier of subsealAnother shot of the subseal around the windowsRental truck is loaded up with windows for installation.Burglar Window ready for installationThe first two windows are installedShot from our apartment roof. The round building on the hill is the Griffith Observatory. (the fire wasn’t anywhere near the construction site)Windows!Stairwell windowScooter’s new scooterDoor between garage and entrywayDoors and windows!Sylvia trying out the new doorsPony wall in Scooter’s room. This will allow light into the stairwellShot from the stairs looking upView from backyardWindows are all taped with waterproofingElectrical panel!The wine cellar gets sheeting and a smaller openingThe punch list is getting doneThe coat closet step upWater heater padGarage door is installed!Sylvia trying out the garage doorGarage door from the insideInsulation installationInsulation arrivesPuffy yellow marshmallowsUnderside of pop-out gets sheeted and vented (this is the final sheeting)Underside of metal awningRaven comes a callingDrywall is deliveredDrywall in livingroom is underway!Drywall is hung!Garage drywallKitchen areaStairs down to master bedroomMasterbath drywall (green board is for water pipe areas)Den closet with electrical and network panelSide shot of stucco paperHouse is papered and lathed from stucco and sidingSiding getting painted.Shot toward kitchen area.House from north-west side. Stucco is complete, siding has been installed and painted and backyard grading worked out.Closer shot of grading (it has been cleaned up since)Extra Bamboo flooring gets applied to built-in storage spacesWindows get stainingWe have power!The phone line is hooked up (left loose so that alarm and DSL can be hooked up and not screw up the phone)Front doors are installed and stainedVideo splitter box is completeVideo box openKitchen cabs in, awaiting counter tops and custom fronts…Built-in cabStained windows in Scooter’s roomStained window in DenMaster Bath cabs in, awaiting counter tops and custom frontsShelving we picked up at a closing CompUSAConstruction box is gone!Chandelier installed. It can be bent in any shape. The shape we chose is blob.Dining room lamp installedMotion sensor lights on the side yardShot of drain pipe (and new motion sensor light)Fridge in the garage! We’ll need a little help bringing it in. Got plans this weekend?Bathtub in the closetA room full of stuff- shower pan, 4 sinks, range/oven, dishwasher, hood, etc.Washer/dryer (in the living room)Satellite dish ready for mountingToiletsWe are hooked up to the sewer!Guess what? Our street is over 20 feet wide. A highway survey team told us so…Pendant lights hungKitchen light hungGuest bath placed (now need tile and linolium)Water supplies readiedRough valve for guest bath/showerSewer work is completed with asphalt patchHood vent is ready for installation (waiting for cabinet work to be done)Linolium underlaymentSylvie is happy with the room colorsHanger bar in den is installed (shelving goes on top)Hand rail gets installedCleaning the bamboo flooring in the Den (wall needs a second coat!)Linolium in the guest bathSylvie cleaning her paint brushRefrigerator is on the correct floor!Linolium in master bathSylvie loves the polkadot linolium in the laundry roomWasher, dryer and tub are on the correct floorKitchen linolium covered in dusty footprintsKitchen doors hungEntryway painted (still need slate)Scoot’s room paintedStairwell paintedCabinet doors hunglaundry roomWide shot of kitchen in disarrayGuest bath tile and hardware are inGlass tile up-closeSylvie painting the pantryKitchen cabinets (finally)Entryway slate is installed.Angled headrest in the guest bath tubMore cabinetsThe pantry gets shelves (and food)This is how we’re living. Dinner is served.Guest bath sink is installed and workingWe’ve started adding furnitureCountertops are installed, fridge and microwave in and working, hood vent awaiting backsplash tiling while the stove waits for gas hookup.Master bath tile has been deliveredMaster bedroom gets paintedMaster bath sinkBoth sinks in the master bath have been setBig tub has its hardware setStairwell with paintKitchen counter stone up closeAttila comes to visitKitchen is in placeX-Mas TreeCabinet handles!Chester likes the new mailbox